Monday 3 June 2019

Snow machine prototype -part 3

This post concludes the story of the making of our machine. Here we run full tests with the completed device, trying out some different materials for snow.


Polypropylene flakes

The first question to answer was whether the method for blocking the ends of the cradle was effective. We ran a test using polypropylene (non-woven fabric) snow, rather than the flakes made from white plastic bags we had been using this far. The polypropylene was easier to handle than plastic when making our flakes, but it hardly fell through the holes in the cradle. At least nothing fell off the ends either, so we can conclude that that part of the design is a success!


 Nothing escapes from the ends, but very little gets through the holes either!

The polypropylene flakes tend to cling to the fabric of the cradle. Plastic is much slippier and easier to shake out with the movement of the machine.

Our second test was with a heavier duty polythene (sorry, I cannot provide more specific technical information) This certainly worked, as you can see in the following video:


Perhaps predictably, the heavier polythene falls more quickly. We felt that the lighter flakes were more attractive. Another issue that can be seen in this video is that the cradle is delivering the snow in bursts. this is because on each cycle we were lifting the cradle back into its resting (not snowing) position, causing a brief respite in the blizzard! In the next test we were able to fix this, simply by the operator not pulling the cradle right to the top

For our final test reverted to the first kind of polythene flakes we made (using the cheapest and lowest quality white polythene bags). We loaded the cradle with a larger amount of flakes, partly to see if having a larger quantity would result in the flakes falling through the holes at a faster rate. we also tried to achieve a smoother delivery by not pulling the cradle right to the top of its travel.


The snow did seem to fall at a faster rate, but we liked the effect and we were also pleased with the more constant delivery.

Into production


And finally here is our highly professional no expense spared demonstration of the device in use.

Outstanding issues


We haven't addressed the issue of using more than one device in battery in order to spread the snow effect right across our stage, but we think that should be fairly straightforward.
It might be worthwhile to try our machine with commercially available polythene stage snow. It might turn out that the cost isn't excessive and that it's worth avoiding the trouble of shredding our own polythene flakes.
Another outstanding issue is that we didn't really work out how our cradle would be attached to the scenery bar. The best way will probably be to use regular lighting bar clamps such as the one in this photo:


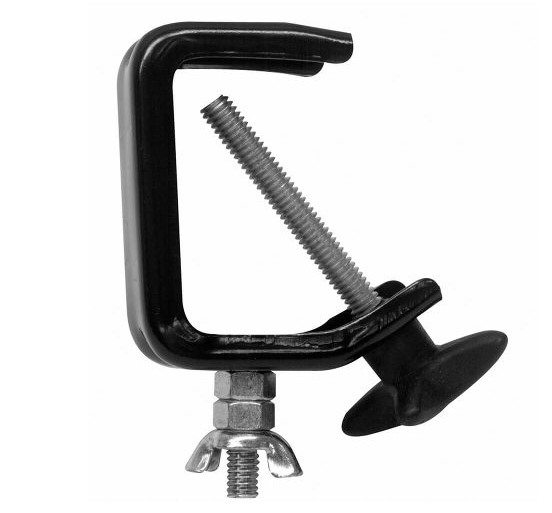
These are available from as little as 5$

Conclusions

We have created a successful prototype that demonstrates how we could successfully build a full scale machine for use on stage. We have also figured out the best options for flakes and know how to make them.
Admittedly a snow cradle of this kind is not as convenient or simple to use as the commercially available drum devices. In particular, our cradle requires a certain degree of skill from the operator to ensure smooth and continuous snowfall. Nevertheless, we don't have any where near the budget for that, particularly if we want several of them.
So, on balance, this approach seems a good one for an amateur company with a limited budget, such as ourselves. It does everything a professional device can do, with only minor drawbacks in ease of operation.


Sunday 19 May 2019

Snow machine prototype - part 2

This post reports on our second practical session designing and developing a prototype of a theatrical snow machine. (The write-up of the first session can be read here).

Make more holes

In our first session we decided that we would use slots of 1cm x 5cm with spaces between them of about 4cm along the length and 6cm across the width of the cloth. Our first task, then, was to cut slots along the whole length of our cloth and across about half of its width. This turned out to be quite time-consuming and should we ever want to make a full scale device, or several in battery, a faster way of doing this would be a big help.

Block the sides

Our first experiments showed us that a lot of material escapes off either end of the cradle and we decided we would need some kind of elastic material cut to roughly the shape of the profile of the cradle in order to close the ends. After some thought, we came up with an off the shelf, or rather "off the peg" solution (Size L):

We looked at a number of designs, and were quite taken by one leopard-skin print, but in the end went for a more theatrical black.
we cut off the front an kept the back.
and sewed the pieces into the gaps at either end of the trough.

From hand-held device to something that can be suspended and remotely operated.


Our idea was to operate the cradle, using various lengths of string which will run along the scenery bar, then down to the wings off stage. We would simply lift the cradle by pulling the string and then allow gravity to return it to its starting position.
These cross sections show how we would operate the cradle.

The first step was to make a simple wooden structure which could both keep one side of the cradle still and also allow us to place 2 eyelets for the string to run through.

 Here you can see it without the cradle in place.


And here with the cradle attached. This photo shows the resting position, with the slots fully raised.

We used a readily avilable polyester chord which is qute shiny and generates minimal friction as it passes through the eyelets. In these videos you can see how it works:


A complete success! The cradle can be raised and lowered smoothly.

What's next?

  • Finish stitching the sides.
  • Work on improvements to the polythene snowflakes and the method of making them.

Hopefully in one more session and blogpost we will have a prototype and proof of concept. Watch this space...


Tuesday 30 April 2019

Project: Design and build a theatrical snow machine prototype.


We chose to investigate a snow machine as we produce a pantomime every Christmas and it would be an exciting addition to our technical repertoire.

The research falls into two areas: machines and material.


Machines

Some snow machines work by blowing detergent based foam. Others work by sprinkling some sort of solid dry flakes. We dismissed foam blowers because they are not really appropriate for the theatre - the foam would make the stage wet and slippy. Even if that were not a problem, blowers produce a jet of snow which would not give  the effect of snowfall across the whole stage

Drum/cylinder devices

These are basically rotating drums made of mesh and containing flakes of some kind. As the drum rotates, some of the flaves fall through the mesh, creating the effect of snowfall. They are usually motorised and the speed can be controlled, producing more or less intense snow.

Trough devices

These have a trough which is the full length of the device containing the flakes. The trough sits on top of a slowly rotating cylinder which has a non-slippery surface and which drags some of the material through a narrow apperture between the trough and the cylinder. Once again, regulating the speed produces heavier or lighter snowfall.

Snow cradles

These are the oldest and simplest devices around. A snow cradle is usually made out of a piece of muslin or other cloth with small holes, through which the flakes fall. The edge of the cloth is attached to two adjacent battens and filled with flakes snow is released by moving one of the battens up and down slightly to allow snow to filter through the holes.

We decided to go for a snow cradle as the first option. It is by far the simplest to make and if we can get it to work we could hang a battery of them across the full width of our panto theatre (13,5 metres)

Materials

As mentioned above, foam is used in snow blowers. Drums, troughs and cradles all use some kind of dry material, which may be made of paper, polystyrene or shredded polythene. The most common commercially available stage snow seems to be shredded polythene, which comes in fine and coarse varieties.

We dismissed polystyrene above all because inhaling its dust is a health hazard and we could not guarantee that our polystyrene snow would be dust-free. We were also concerned about it sticking to clothes and just generally being messy and inconvenient to handle. We decided to run tests with paper and polythene flakes in order to evaluate how easy it would be to produce them ourselves in the necessary quantities and, most importantly, how realistic they look in action.

Not-so-fun fact: When the Wizard of Oz movie was made in 1939 the fake snow used on set was highly carcinogenic asbestos! You can read more about this here.


Our first attempt at a snow cradle

We came across instructions online which suggested that we should use 6' (2m) width of cloth. Neverthelsess, we wanted to try with something much narrower, at least to start with. One reason for this is that our panto theatre doesn't have a fly loft and space above the stage is very resricted. Anything we install above the stage is potentially visible from the front rows, particularly if it is well downstage. So we decided to work with 60cm width, spacing our battens 15cm apart (so making a "trough" at the lowest point of the cloth with a 15cm diameter).


We attached the battens (broom handles) with staples and gaffer tape.


and marked out the area within which we would cut the holes. The holes go to one side of the centre, in a 20cm wide strip. the other side of the cloth is free of holes this part will form the trough when the machine is not active, so that no flakes escape.

We cut holes of about 1cm2 at regular intervals. Initially we wanted to test having a greater or lesser density of holes, although this idea changed slightly once we started to run tests.

 We also tried to make some polythene snowflakes from a white plastic bag. First we sliced strips with a cutter.


Scrunched them up a bit...

...and chopped them up into bits.


We made some paper flakes out of regular white photocopier paper in a similar way.


First test with polythene flakes

Basically nothing fell through the holes, although we had only made a tiny amount of material and we thought that might be part of the problem, so we decided to make more.

Second test with polythene flakes

Despite having considerably more material this time, very little made it through the holes.


Third test: paper flakes


Our first test with paper wasn't massively successful either. Most of the material just fell off the sides. At least both the paper and polythene flakes fell in a reasonably snowy way! The polythene floated a bit more and fell more slowly which seemed preferable.
At this point we decided to enlarge the holes in the cradle, basically joining 2 holes into one to make one long hole.

Fourth test: polythene flakes and enlarged holes

The larger holes did the trick! Material is still falling off both ends of the cradle and we need to find a way of blocking those openings. Some improvements to our polythene flakes still seem necessary too.

What's next?

  • Cut more holes in the cradle, perhaps experiment with  having holes closer together/further apart.
  • Block the ends of the cradle somehow.
  • Develop the cradle from a hand-held device to one that can be suspended above the stage.